The Administration Console
By now everything will be set up for you. You will now have the opportunity to make changes to passwords, accounts, statuses, etc.
The URL for your administration console will usually be yourcompanyname.deskdirector.com/admin. If you want to change this at any time, please let us know.
After accessing your URL you should be greeted by a login page:

After successfully signing in with your given credentials, you will be greeted with the main admin console page:

The main page of the Administration Console is the Company Configurations page. This shows a list of all the companies and some of their details.
We will go through each of the other pages in the left navigation bar in order.
Dashboard
The dashboard allows the DeskDirector admin to see which agents and clients are connected to DeskDirector at that point in time. It shows your their name, company, email, state, device, and DeskDirector version. Queue lets you see if there are any active chats or not.

Company Configs
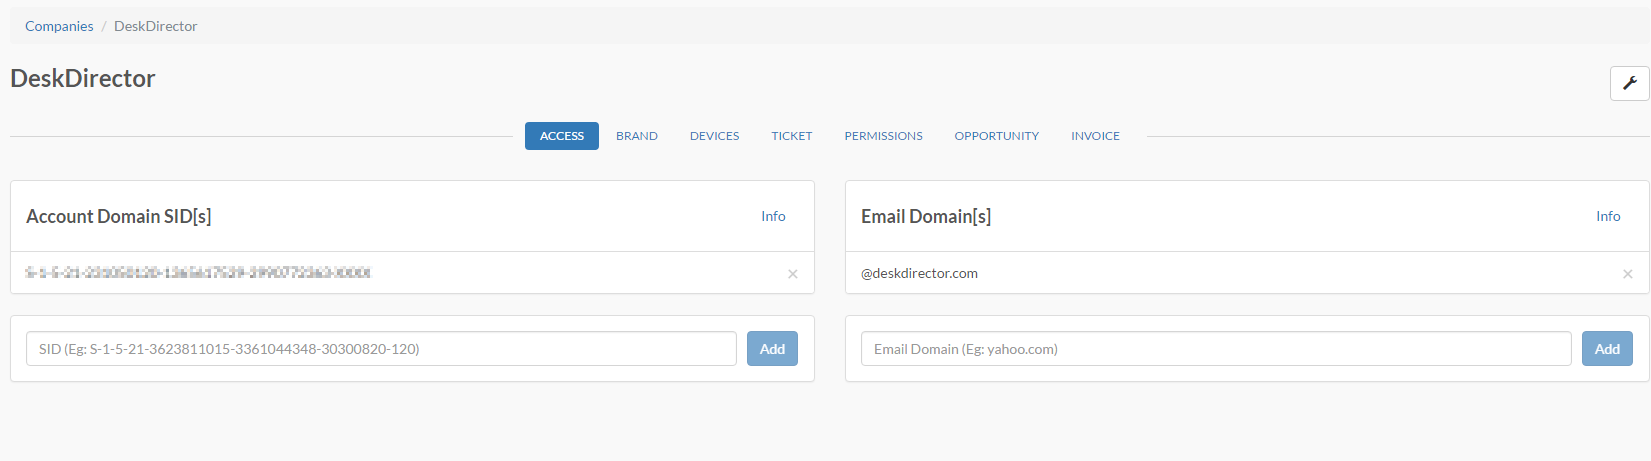
From this page you can see all companies, or individually select one. From the main page, you can download the DDGetSid tool which allows you to get the SID of a company by running it on the client's domain. It can be an end user's computer or a server,as long as it is in the domain. When you individually select a company you can see their account domain SID(s) and their email domains. This is for the purposes of authentication in the installed client.
The brands tab allows you to choose the default branding for your DeskDirector Web Application.
The devices tab shows you the devices registered for push notifications.
The Ticket, Opportunity, and Invoice tabs are very similar. They select the boards/opportunity statuses or types/invoice statuses that will be shown on the DeskDirector Portal. The settings in the company settings will override the global settings.
The Permissions tab will let you manage what permissions are applied to the contacts belonging to that company
Manage Learning
The manage learning tab leads to DeskDirector's built in learning centre. The Learning Centre allows you to post training and help documents, videos, PDF's, and more.
As long as the linked material is available externally from a browser, then the DeskDirector client will be able to embed this within the Learning Centre window.

To add a category, simply hit "Add" and enter the new category name. Then click the category name in order to add any number of links to view within DeskDirector.
In the category screen, there are some settings available to change:
1. Icon: you can change the icon shown in the client console for this category here.
2. Top Level Category: enabling this makes this category appear on the navigation side pane of the client console.
3. Auto Navigate to first Item: enabling this will automatically open the first item in this category.
4. Add Learning: adds a learning link to the Learning Centre. You need to give it a name, a description, a version, and a URL.
5. Manage Filter: this is where you can limit the category to a selection of companies or contacts.
6. Tokens: these can be used inside the URLs. eg, https://www.google.com/search?q=[companyname] will search for the users current company.
Manage Tabs
IMPORTANT NOTE: The Staff HUD is no longer being supported and will soon be replaced with DD-Tech. This is a legacy tab. The Staff HUD is only given out to clients that wish to use Chat.
The manage tabs section configures which tabs you can access from the DeskDirector Staff HUD. There are two types of tabs, main tabs and session tabs. Main tabs are always visible while Session tabs are visible only when you have a ticket session opened.

Just like the learning centre, it is also possible to use tokens inside the tabs. The only caveat is that main tabs can only accept member related tokens.