Access Control
Request Types

1. Create Type: This button allows you to create a new request type. You will have to set a category name (parent) and a request type name. By giving it a category name, you are able to split support requests into two levels, and group related request types together.
2. Test Types: Tests companies and clients against these requirements in order to see which of them have access to the requests.
3. Selection: Allows to select all or multiple(by status) request types at once.
4. Search Bar: Allows you to look through request types.
5. Copy Setting: Allows you to choose a source to then copy either the ticket setting or the filter setting from the source to the selected request types.
The request types table provides key information about the current request type that have been set up.
6. Status: This shows whether the request type set up is currently enabled or disabled.
7. Parent: Shows the name of the category used to group the request types.
8. Name: Name of the request type.
9. Filter: Shows to what filter the request type applies. To see the filter in more detail, the request type must be opened.
10. Board: Shows which board in ConnectWise is linked to the request type.
11. Status: Shows the status the ticket will be created under for each request type.
12. Priority: Shows the priority of ticket after creation.
Creating a new request type/editing a request type
To create a new request type, you just need to click on Create Type. This will prompt you for a Parent Name and a Name for the request.

In order to edit a request type you just need to click the request type's name. These actions will take you to another request types screen, with four main pages: general, ticket, filter, and language.
General

The general tab for the request types allow you to change whether the current request is enabled or not. It also allows you to add or modify the names and templates of the request type. You can also add a form in URL form to show instead of the body template.
Ticket

The ticket tab allows you to set the details of the ticket the request type creates. It allows you to chose a board for the request type to work in. All other fields indicate how the ticket will be populated when it's created by the user. This allows you to give different request types different priorities.
Filter

The filter tab lets you decide who can access the request type. Global access means access across all levels. If it is on, then the request type can be accessed by everyone. If it is off then it can be accessed by no one. Exceptions can be added to the global access.
If the global access is on then it will allow you to exclude companies and contacts from accessing the request type.
If the global access is off then it will allow you to include companies and contacts to access the request type.
If you want to exclude everyone but a select few from a company, the filters allow you to do this too. You just click allow and select the person you want to allow access to the request type.
In the case of excluding just one person from the company, the allow button will change into Disallow. The same procedure stands.
The filter summary on the right of the filter tab sums up the current setting and explains what your filter is doing.
Language
![]()
The last tab is the language tab, this tab allows you to translate the request type name into any other language you want to use DeskDirector. (This is only available if you have purchased the Multilingual feature for DeskDirector, and configured it under Interface Settings.)
Maintain Contacts
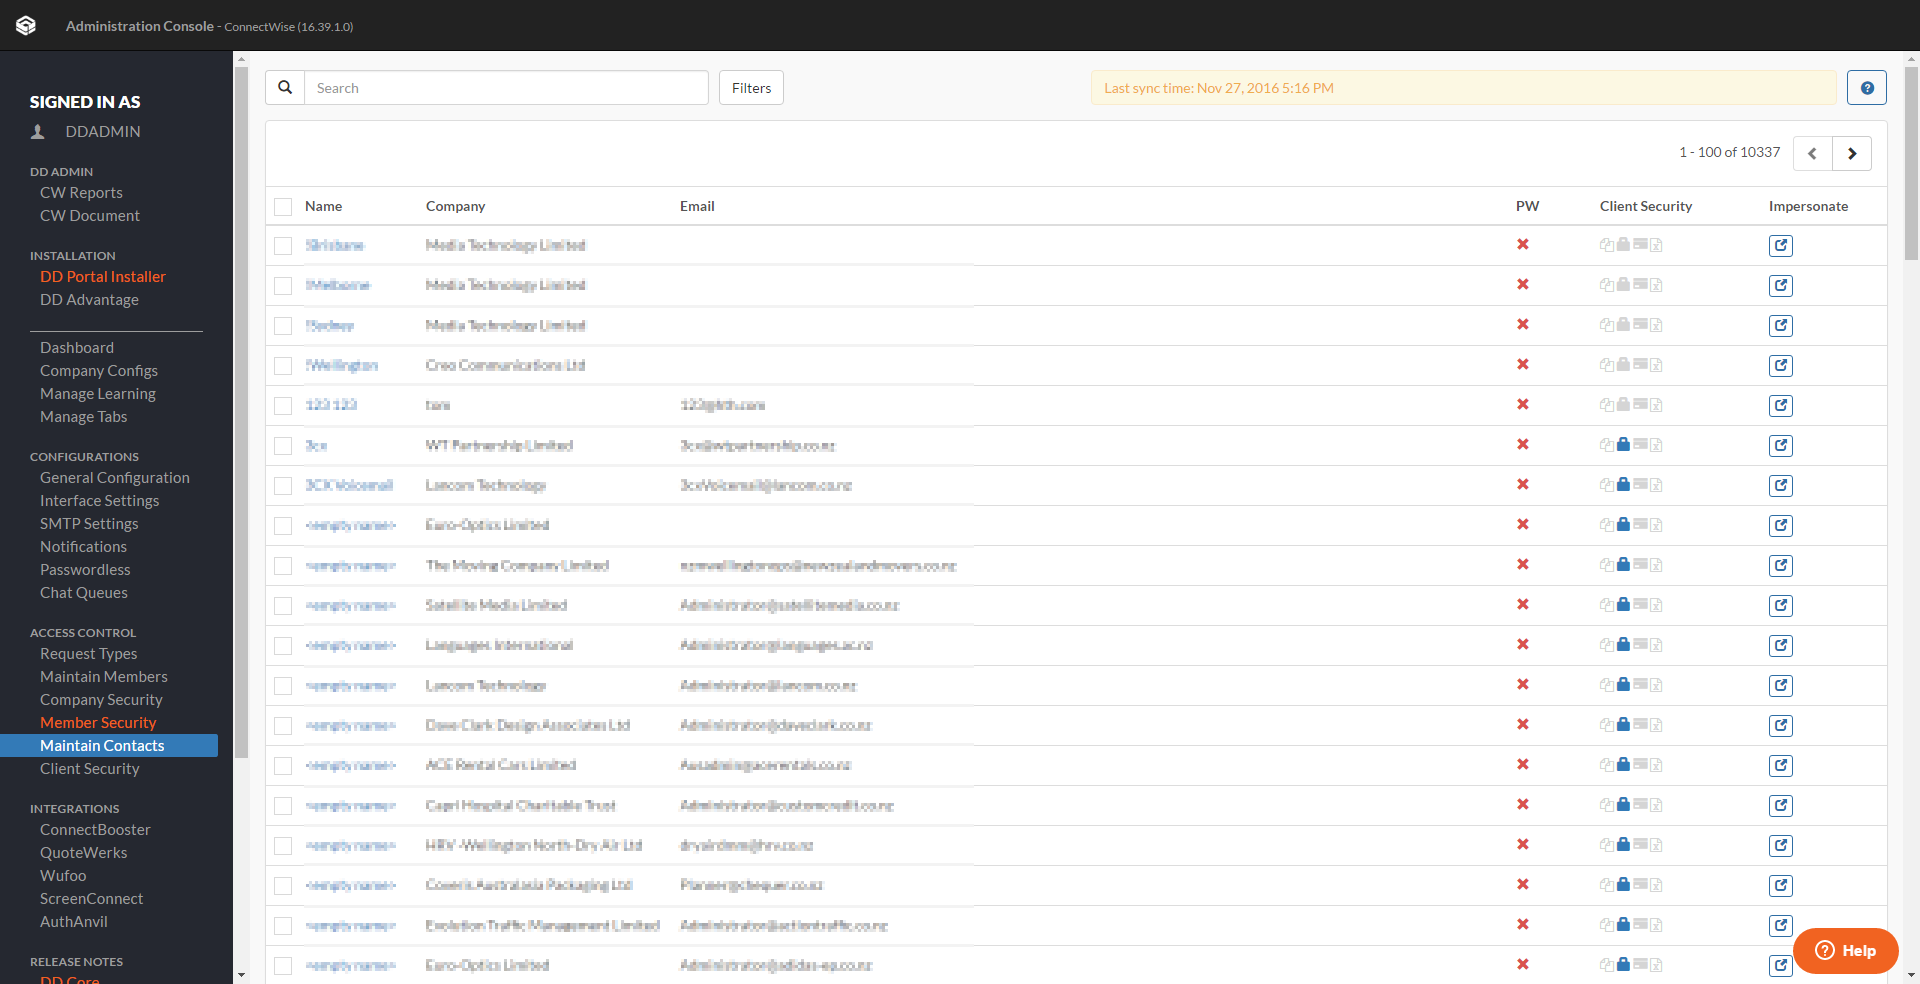
The Impersonate contacts tab allows you to find a contact by name, company, or email. It then allows you to see the web version of DeskDirector logged in as this user.
You can also use the filters to find a contact that suits the needs you are looking for.
The PW column shows if the user has a password set up.
The Client Security column shows whether the users have an active ticket setting, permissions, opportunity setting, and invoice setting.

In order to impersonate a contact all you need to do is find the contact and then press the Impersonate button ( ). A new tab will open up to the contact's DeskDirector Web Client.
Company Security
(This is only relevant for DDTech)

The company security page has filters that allows you to control which companies appear in DDTech.
Maintain Members
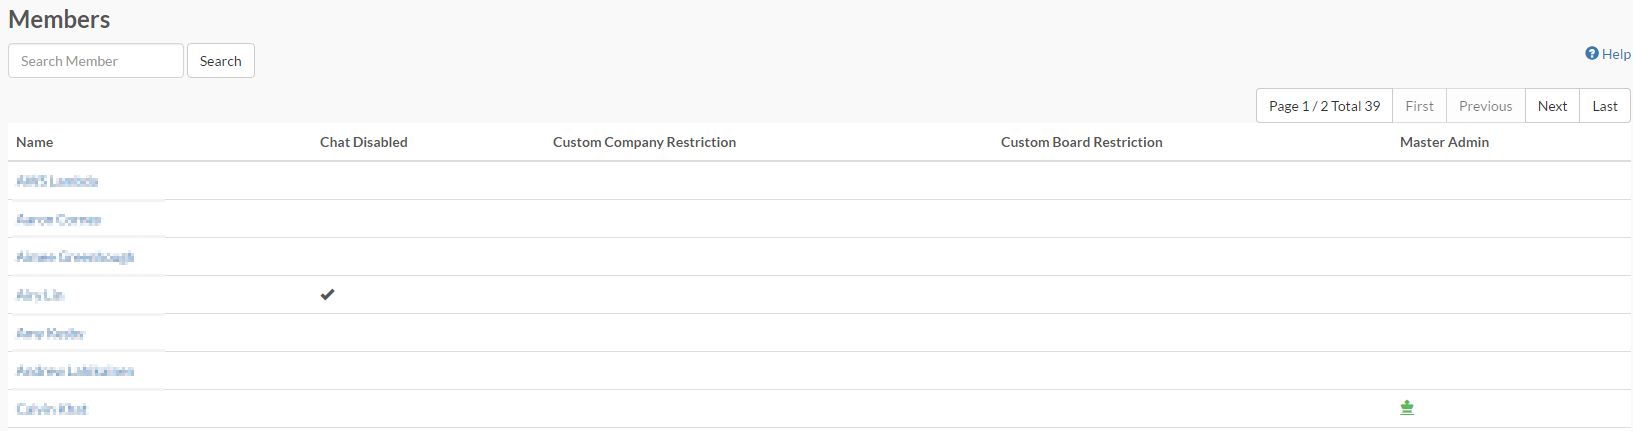
From this page you can see all your ConnectWise members and their restrictions on DDTech. By clicking on a member you can drill into them and set company restrictions to limit DDTech to certain companies for that member. You can also set custom board restrictions, so that members only have access to certain boards. One of the most important features however, is the Master Admin feature. Members with Master Admin enabled can log in to the DeskDirector admin console using their ConnectWise credentials. Please note only Master admins can make changes to the DeskDirector Advantage Features.
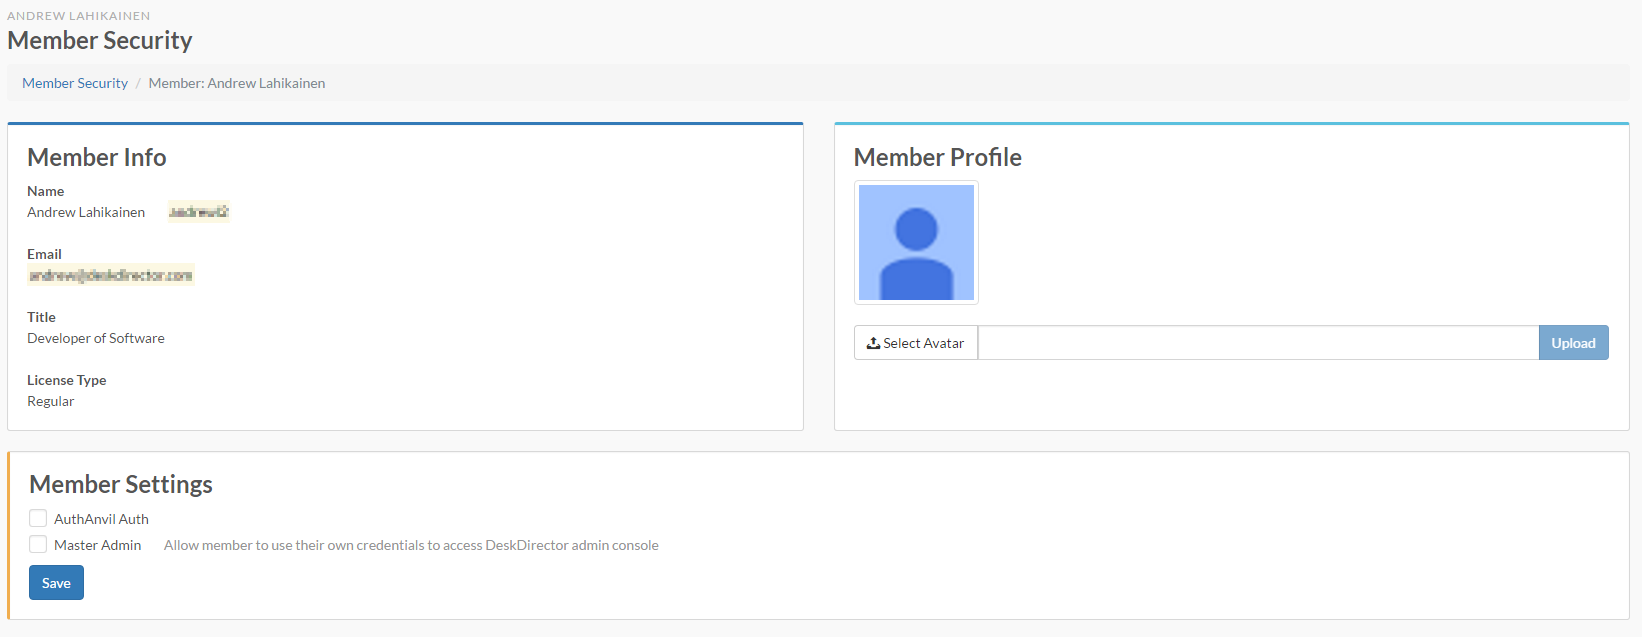

Member Security
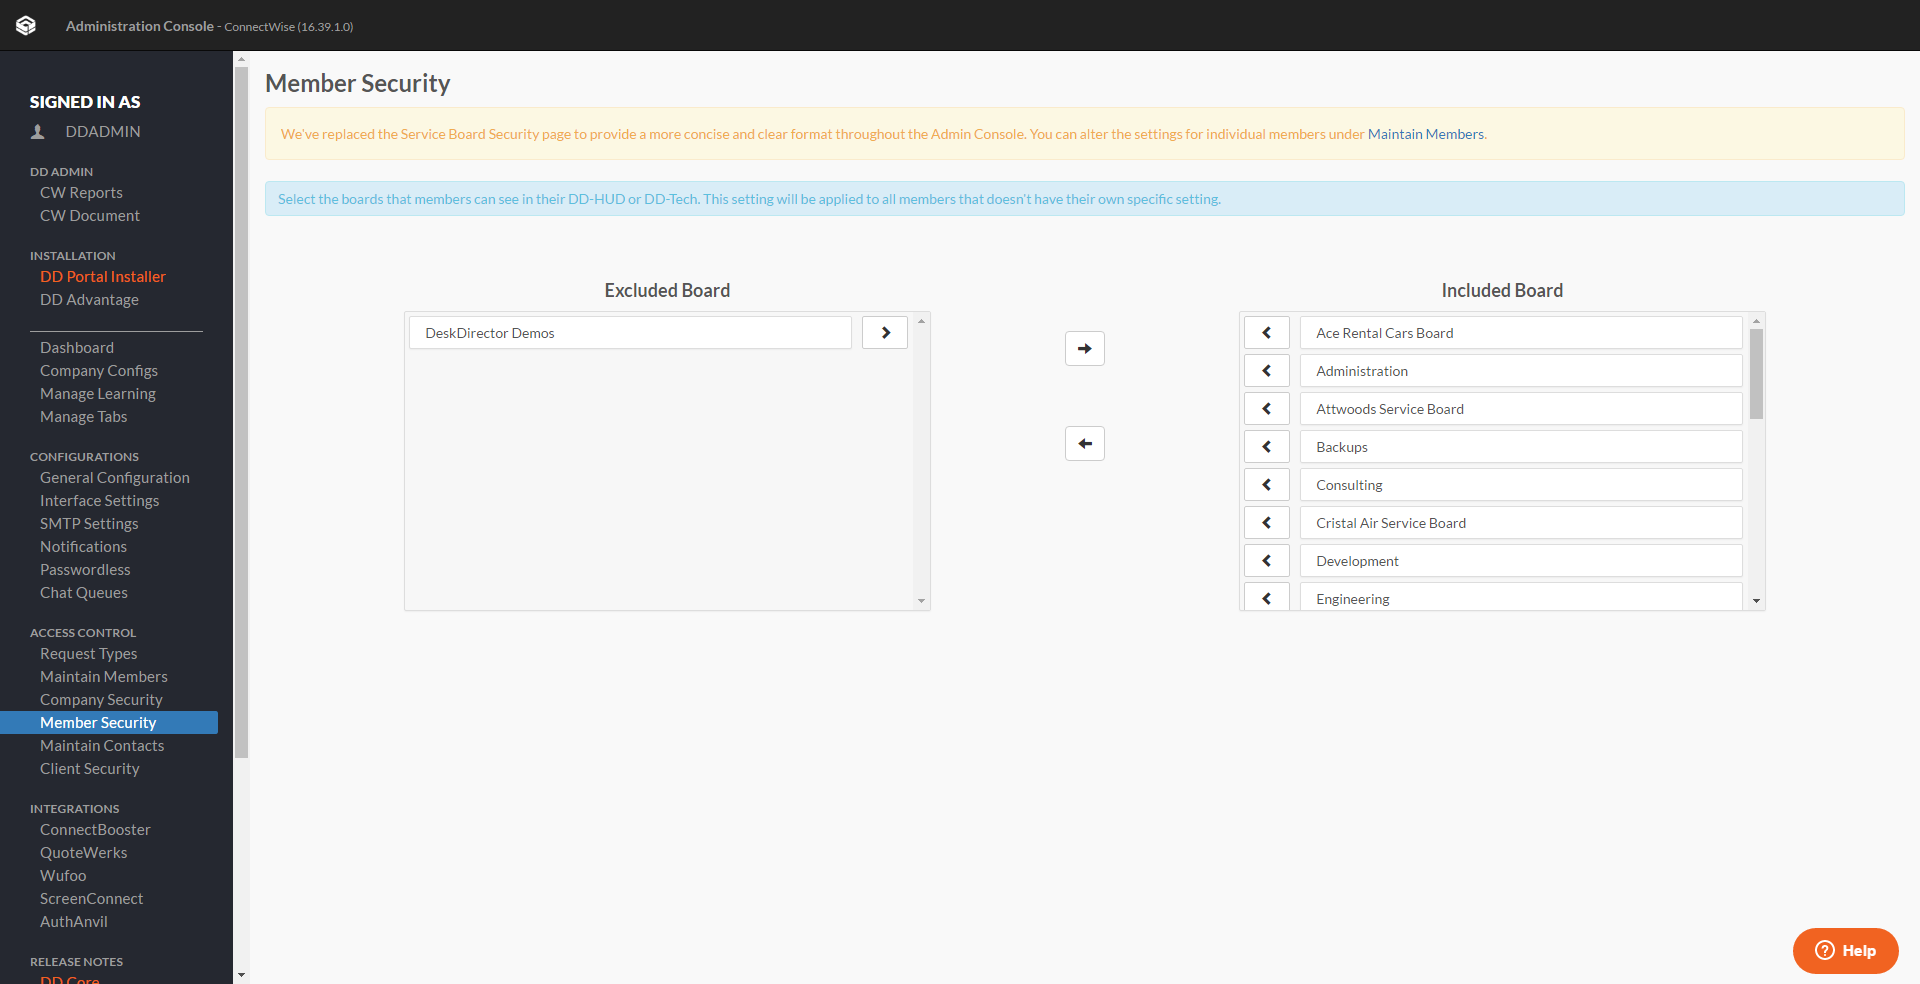
The Member security page enables you to see which boards are available to your staff. You can change these at a global staff setting by moving them from one side to the other.
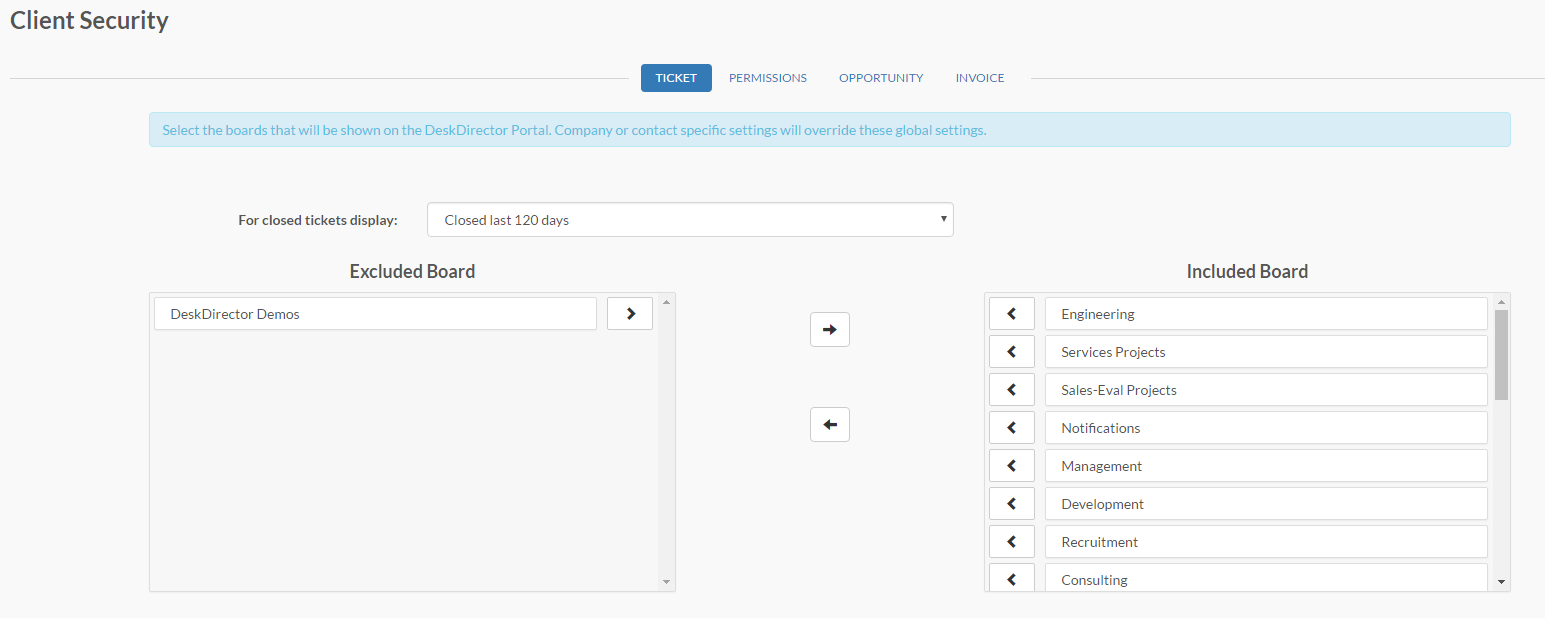
Client Security
The client security page shows which boards will be shown on the DeskDirector Portal. It is important to remember that Company or contact specific settings will override these global settings. You can also set up global permissions, opportunity, and invoice settings.